
A complete, practical guide for beginners and serious home gardeners
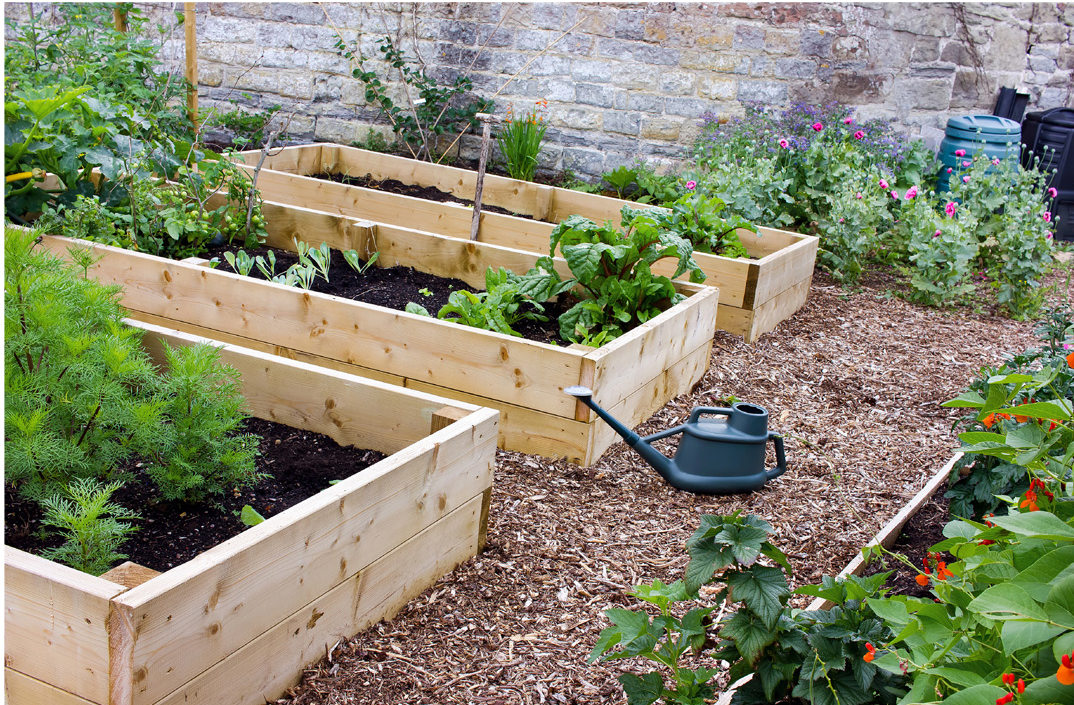
Raised garden beds are one of the most effective ways to grow healthy plants, improve soil quality, and maximize yields—especially in small spaces or poor native soil. But success doesn’t come from throwing together some wood and filling it with dirt. A well-planned raised garden bed is the result of thoughtful decisions made before the first board is cut or the first seed is planted.
This guide walks you through the entire process, from initial planning to long-term maintenance, with real-world considerations drawn from practical gardening experience. Whether you’re growing vegetables, herbs, or flowers, this article will help you design a raised bed that works with nature, not against it.
What Is a Raised Garden Bed (and Why It Works)
A raised garden bed is a defined growing area where soil is elevated above ground level and contained within a structure—commonly wood, metal, stone, or composite materials.
Core benefits
- Superior soil control: You choose the soil mix, not your yard.
- Improved drainage: Roots get oxygen and avoid waterlogging.
- Warmer soil: Earlier planting and faster growth.
- Reduced compaction: You never step on the growing area.
- Easier maintenance: Less bending, clearer layout, fewer weeds.
From an agronomic perspective, raised beds create a managed root environment, which is the single most important factor for plant health.
Step 1: Define Your Purpose and Crops
Before thinking about size or materials, answer one critical question:
What exactly do you want to grow—and why?
This decision drives every other choice.
Common raised bed goals
- Leafy greens (lettuce, spinach, arugula)
- Fruiting crops (tomatoes, peppers, cucumbers)
- Root vegetables (carrots, beets, onions)
- Culinary herbs
- Mixed kitchen garden
- Cut flowers or pollinator plants
Why this matters
Different plants require different:
- Root depths
- Spacing
- Nutrient levels
- Water frequency
For example:
- Lettuce thrives in shallow beds (15–20 cm)
- Tomatoes perform best in deeper beds (30–45 cm)
- Carrots need loose, stone-free soil
Pro tip: Start with fewer crops done well, rather than many crops done poorly.
Step 2: Choose the Ideal Location
Sunlight is non-negotiable.
Sun requirements
- 6–8 hours of direct sun for most vegetables
- Leafy greens can tolerate partial shade
- Fruit-producing plants need full sun
Observe your yard throughout the day:
- Morning sun is gentler and ideal
- Afternoon sun is stronger but can stress plants in hot climates
Additional site considerations
- Proximity to a water source
- Level ground (or ability to level it)
- Airflow (prevents fungal disease)
- Distance from trees (roots and shade compete with crops)
Avoid placing raised beds:
- Under large trees
- In low spots where water collects
- Directly against walls with reflected heat
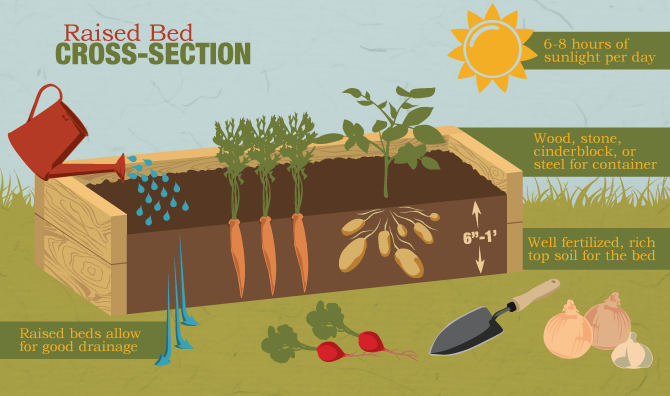
Step 3: Decide on Raised Bed Dimensions
A raised bed should be designed for human reach, not just plant growth.
Recommended dimensions
- Width:
- 90–120 cm (3–4 ft) maximum
- You should reach the center without stepping inside
- Length:
- Flexible (1.2–3 m is common)
- Height:
- 15–20 cm: shallow crops
- 30–45 cm: mixed vegetables
- 60+ cm: accessibility / poor soil
Ergonomics matter
Higher beds:
- Reduce back strain
- Improve drainage
- Require more soil investment
Lower beds:
- Cheaper
- Heat up faster
- Less suitable for deep-rooted crops
Choose based on your body, budget, and crops.
Step 4: Select the Right Materials
Your choice of material affects durability, safety, and cost.


Wood (most popular)
Best options:
- Cedar
- Redwood
- Douglas fir
Avoid:
- Pressure-treated wood (older types may leach chemicals)
Pros: Natural look, easy to build
Cons: Decomposes over time
Metal (galvanized steel)
Pros: Long lifespan, modern look, pest-resistant
Cons: Heats up quickly, higher cost
Stone or brick
Pros: Permanent, excellent thermal mass
Cons: Labor-intensive, expensive
Composite materials
Pros: Long-lasting, low maintenance
Cons: Cost, variable quality
Rule of thumb: If growing food, always prioritize food-safe materials.
Step 5: Prepare the Ground Base Properly
Even though it’s a “raised” bed, what’s underneath still matters.
Ground preparation steps
- Remove grass and weeds
- Level the surface
- Loosen the soil beneath (optional but beneficial)
- Lay down:
- Cardboard or newspaper (weed suppression)
- Hardware cloth if rodents are an issue
Avoid plastic sheets—they trap water and harm soil life.
This base allows:
- Drainage into native soil
- Earthworms to migrate upward
- Roots to penetrate deeper if needed
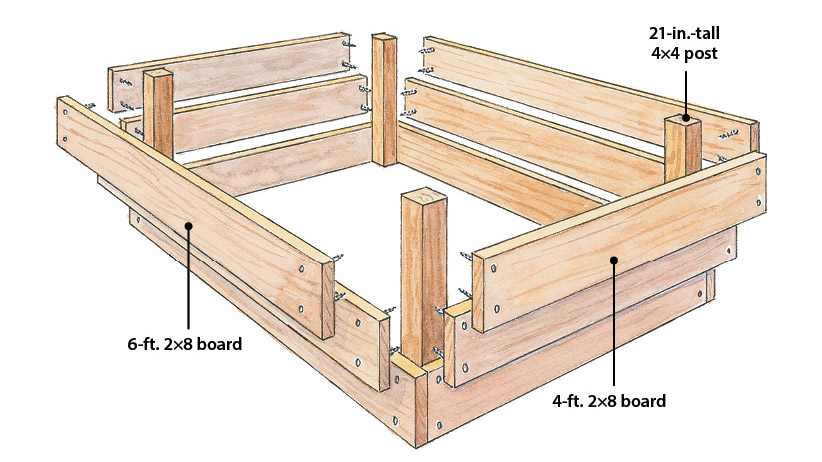
Step 6: Build or Assemble the Bed
Construct the frame securely:
- Use exterior-grade screws
- Reinforce corners
- Add cross-bracing for long beds
Ensure:
- Straight edges
- Square corners
- Stable structure
Place the bed before filling it. Moving a filled raised bed is nearly impossible.
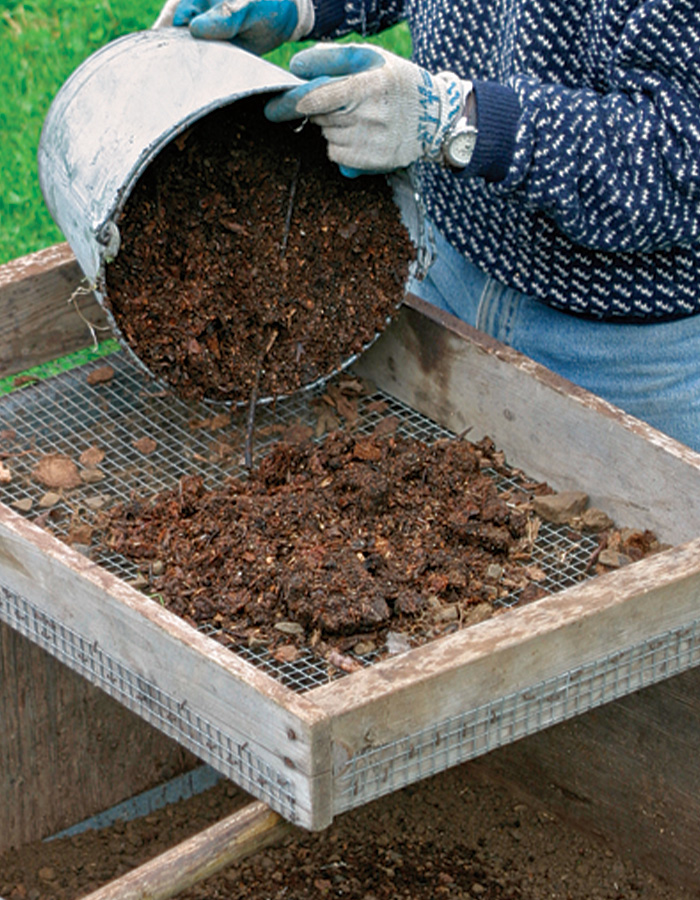
Step 7: Create the Ideal Soil Mix
Soil is where raised beds truly outperform ground gardens.
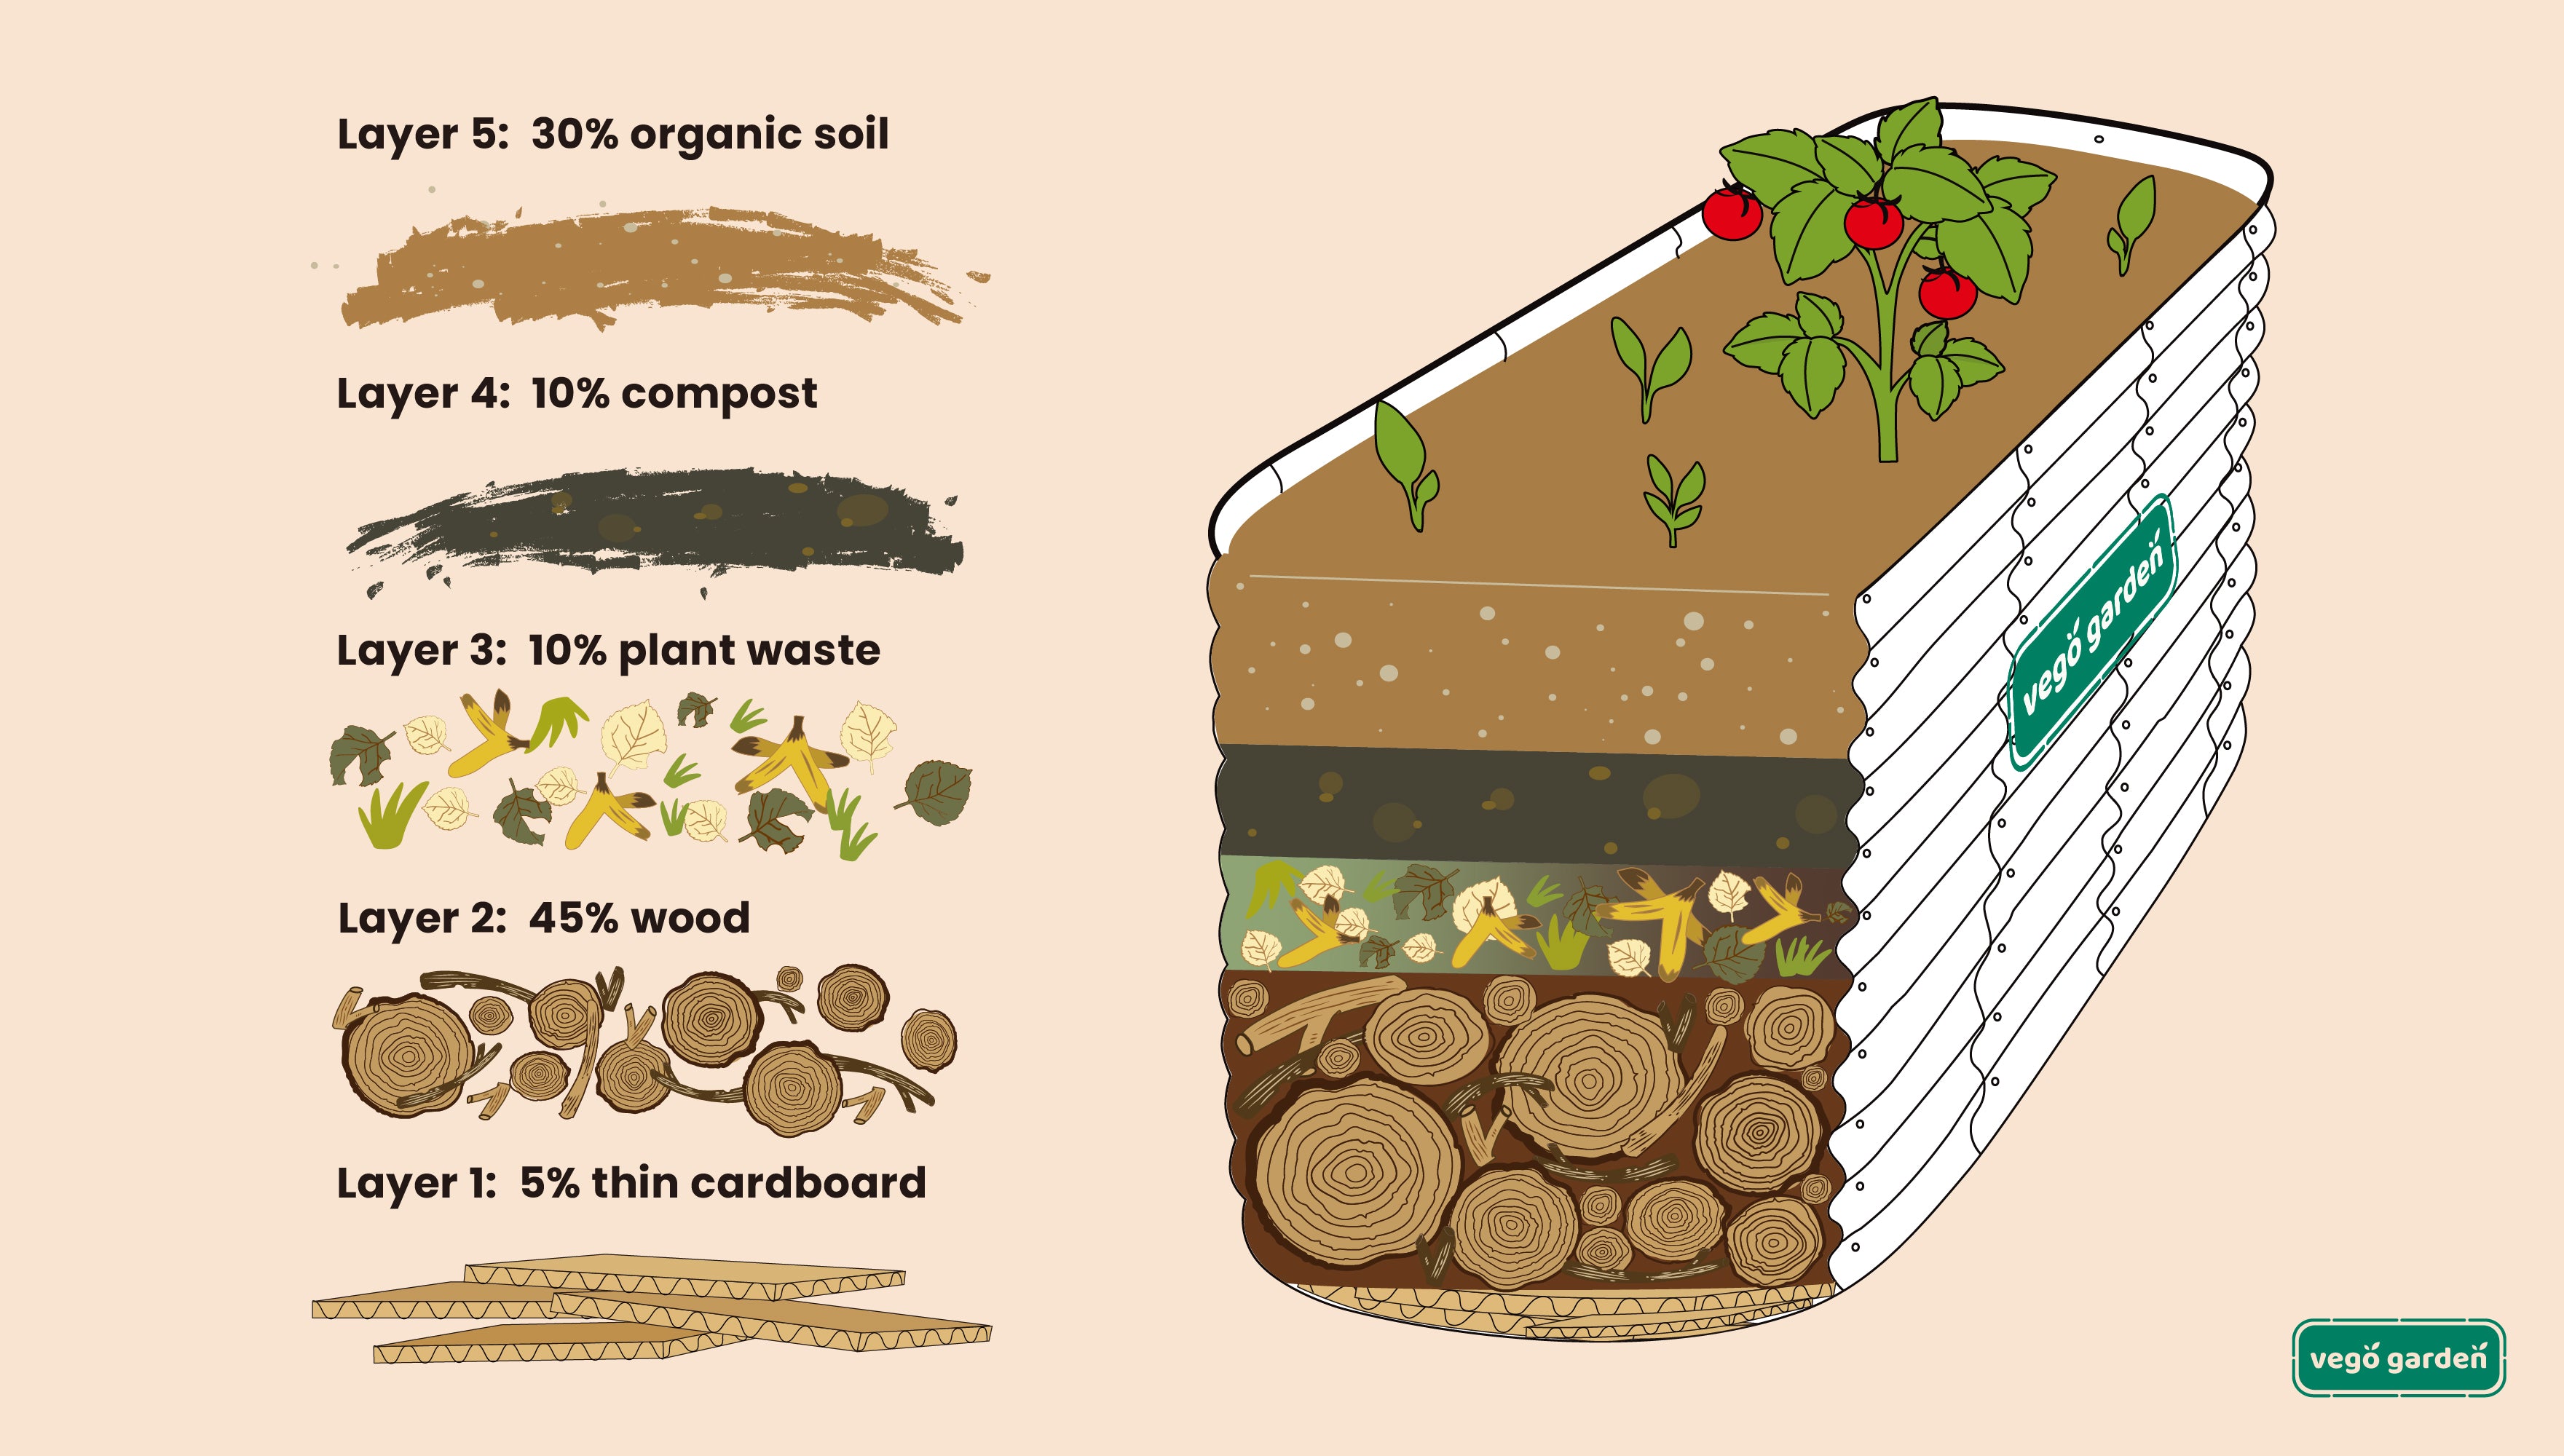
The classic raised bed soil formula
- 40% topsoil (structure)
- 40% compost (nutrition)
- 20% aeration material (perlite, coarse sand, coco coir)
This blend provides:
- Drainage
- Water retention
- Microbial activity
Optional enhancements
- Worm castings
- Aged manure
- Rock dust for minerals
- Mycorrhizal fungi
Avoid using garden soil alone—it compacts and drains poorly.
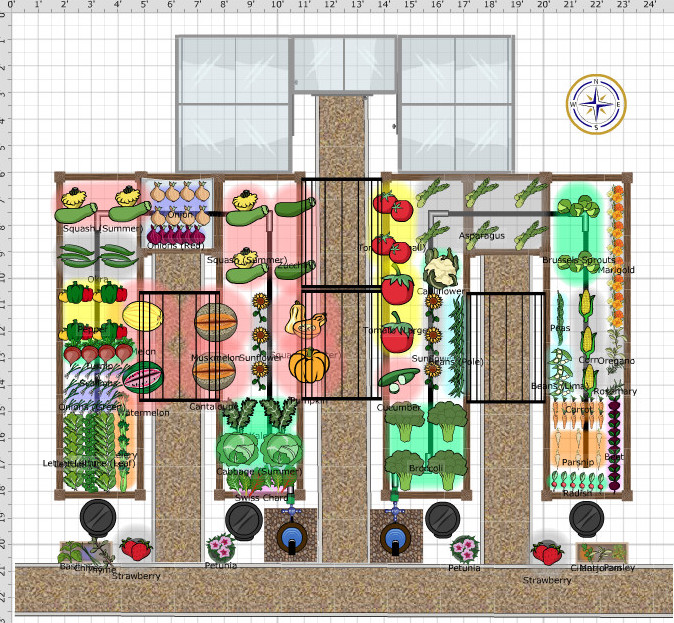
Step 8: Plan Plant Spacing and Layout
Raised beds reward intentional spacing.
Layout principles
- Follow intensive planting methods
- Use square-foot gardening as a guide
- Plant in grids, not rows
Example:
- 1 tomato plant per 30×30 cm square
- 4 lettuce per square
- 16 carrots per square
Companion planting benefits
- Natural pest control
- Improved growth
- Efficient space use
Examples:
- Basil with tomatoes
- Onions with carrots
- Lettuce under taller crops
Step 9: Install Irrigation Early
Watering becomes easier when planned in advance.


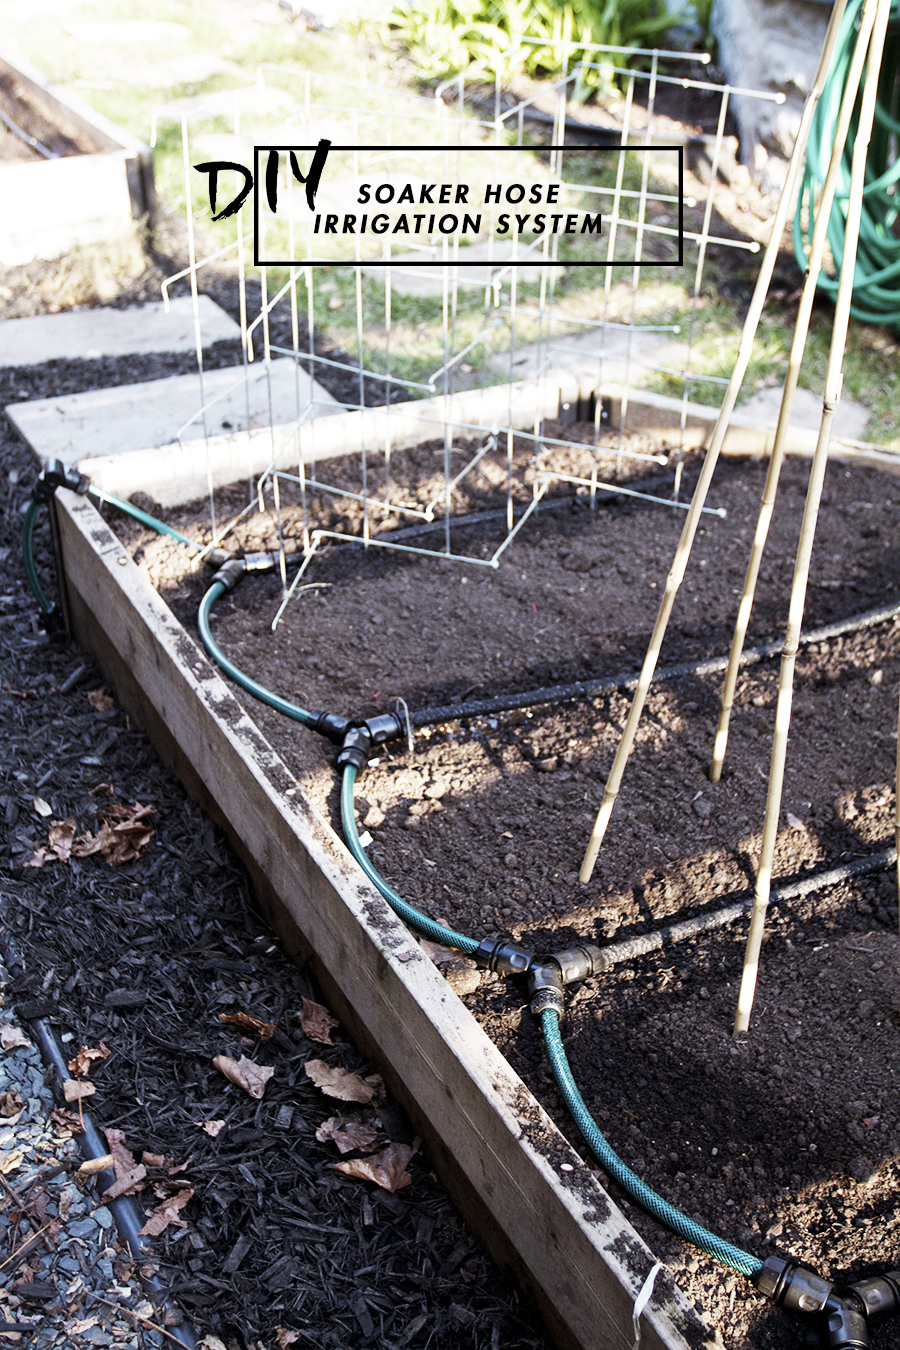

Best options
- Drip irrigation (most efficient)
- Soaker hoses
- Manual watering (small beds)
Drip systems:
- Reduce disease
- Save water
- Deliver moisture directly to roots
Install irrigation before planting for clean setup and even coverage.
Step 10: Mulch and Protect the Soil
Mulch is essential, not optional.
Benefits of mulching
- Moisture retention
- Weed suppression
- Soil temperature regulation
- Improved soil structure over time
Best mulches
- Straw
- Shredded leaves
- Wood chips (for paths, not directly on seedlings)
- Compost (light layer)
Maintain 5–8 cm of mulch throughout the growing season.
Step 11: Maintain and Improve Over Time
Raised beds improve with age—if managed correctly.
Seasonal maintenance
- Add compost annually
- Rotate crops
- Refresh mulch
- Check structural integrity
Long-term soil health
- Avoid over-fertilizing
- Encourage earthworms
- Grow cover crops in off-seasons
Think of your raised bed as a living system, not a container.
Common Mistakes to Avoid
- Building beds too wide
- Using poor soil
- Ignoring sunlight patterns
- Overcrowding plants
- Skipping irrigation planning
Most failures come from rushing the planning stage.
Final Thoughts: Build Once, Harvest for Years
A raised garden bed is an investment—in time, materials, and learning. When planned correctly, it delivers:
- Higher yields
- Healthier plants
- Less work
- Greater satisfaction
By approaching your raised bed methodically—from purpose to placement, soil to spacing—you set yourself up for long-term success rather than seasonal frustration.
If you’re serious about growing food efficiently and sustainably, a well-planned raised garden bed isn’t just an option—it’s a foundation.